Designing a West Elm-Inspired Miniature Dining Table for the Dollhouse

Designing a West Elm-Inspired Miniature Dining Table for the Dollhouse

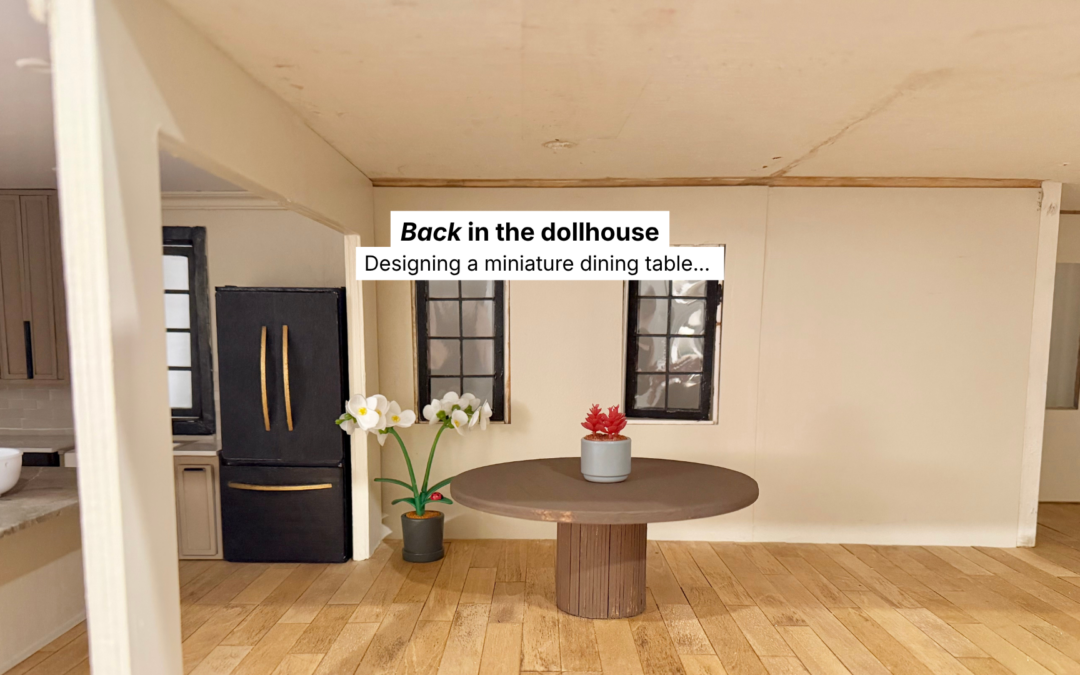
The dollhouse dining room officially has a table now… and honestly, it accidentally ended up giving tiny West Elm showroom energy.

This project started the same way a lot of these builds start for me: rough sketches, testing proportions, cardstock prototypes, and a lot of figuring things out in real time before committing to the final version.

I knew I wanted the dining room to feel modern, warm, sculptural, and a little organic-modern without making the space feel overcrowded. So before building anything permanently, I spent some time experimenting with different shapes and proportions to see what actually felt right in the room.

And honestly? Those little testing phases are kind of my favorite part.

Starting With Cardstock Prototypes

One thing I’ve learned while working on miniatures is that proportions can look completely different once they’re physically inside the dollhouse.

Something that feels perfect on paper suddenly looks:

  • too bulky
  • too short
  • too thin
  • weirdly oversized
  • or just… off

So before building the actual table, I used cardstock to test the overall shape and scale first.

Honestly, this step saves me so much frustration later.

It also helps me figure out:

  • the overall silhouette
  • the width of the tabletop
  • how much visual weight the base should have
  • whether the proportions feel balanced in the room

And because this dining table has more of a chunky pedestal-style base, getting those proportions right mattered a lot.

The Overall Style Direction

The vibe I kept coming back to was very:

  • modern organic
  • sculptural furniture
  • warm wood tones
  • contemporary interiors
  • tiny West Elm energy

I wanted the table to feel simple, but still visually interesting enough to anchor the room.

The pedestal base ended up becoming one of my favorite parts because it gave the table more presence without overwhelming the room itself.

Letting the Process Be the Process

One thing I really liked about filming this project was how conversational the footage ended up feeling.

A lot of the video became less about “perfect instruction” and more about documenting the actual process:

  • testing ideas
  • adjusting proportions
  • reacting in real time
  • changing direction
  • figuring things out as I went

And honestly, I think those moments are what make creative projects interesting in the first place.

Not just the final result — but all the tiny decisions and experiments that slowly shape the project into what it becomes.

The Final Result

Once the table was finally in place, the whole dining room immediately started feeling more finished.

It still needs chairs and more styling eventually, but the table helped establish the direction of the space:
modern, warm, minimal, and slightly tiny-West-Elm-ish.

And honestly… I’m kind of obsessed with how it turned out.

Tools + Materials Used

Full materials list and everything I use in my studio is linked in my Amazon Favorites — coming soon.

Watch the Full Build

The video above walks through the entire process with real-time footage and voiceover commentary throughout the build.

If you want to follow the full dollhouse renovation series from the beginning, you can also find the rest of the builds, room progress, and miniature projects over on the YouTube channel.

What’s Next

The dollhouse is still very much in progress… which means there are still plenty of rooms, projects, tiny design decisions, and “wait… why did I think this would be easy?” moments ahead.

More builds, styling updates, furniture projects, and room progress are already on the way.

Make sure to subscribe on YouTube and follow along on social media if you want to keep up with the next phase of the renovation. Honestly, things are starting to get really good now.

Starting the Interior Renovation on My Vintage Dollhouse

Starting the Interior Renovation on My Vintage Dollhouse

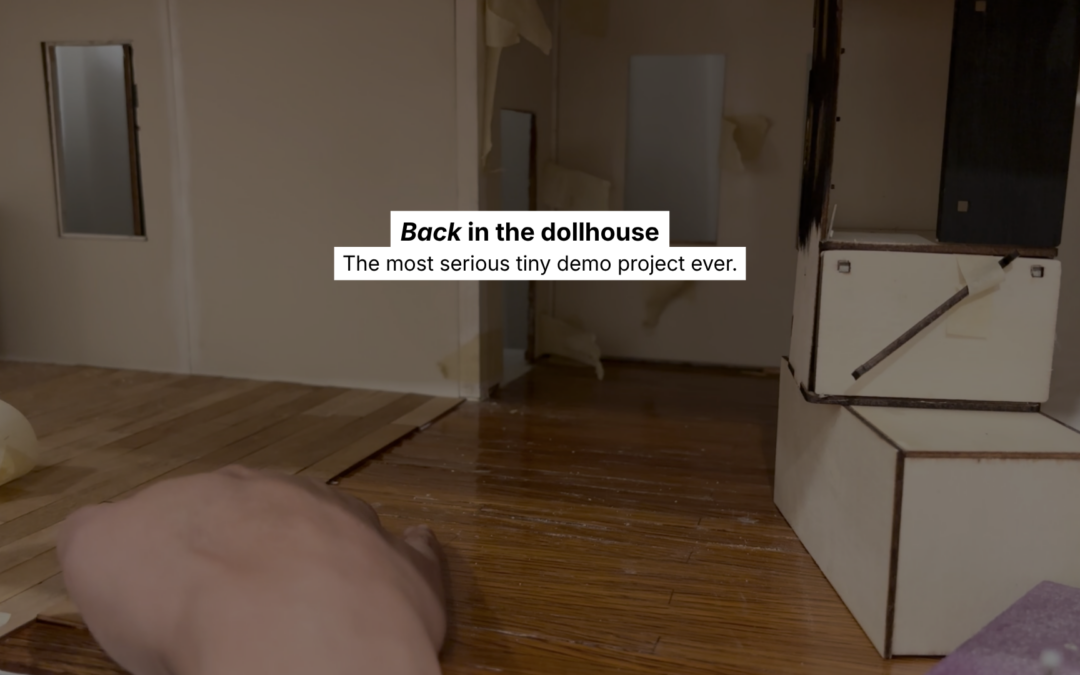
We finally started tearing into the interior of the dollhouse.

This phase of the renovation included demo, wallpaper removal, sanding, rebuilding sections of the walls, and installing the first section of custom flooring downstairs.

A lot of this video is honestly just tiny renovation chaos in the best way possible.

There’s peeling wallpaper, piles of debris, sanding dust everywhere, tiny trim pieces flying off the walls, and a surprising amount of very satisfying clicky-clacky demo sounds.

And somehow, despite the mess, this was also the stage where the house finally started feeling like it was moving forward.

One Last Walkthrough Before Demo

Before starting the interior demo, I wanted to do one more walkthrough of the house as-is.

Every floor looked completely different from the next.

Some rooms had carpet, some had wallpaper, some had tile, and some had what looked like wood plank flooring — although most of that turned out to basically be laminated paper strips cut to resemble wood boards.

The second-floor bathroom still had all the original tiny fixtures and tile in it, and there were old trims, built-ins, and little details all over the house from different phases of its life over the years.

Then we started ripping everything apart.

Wallpaper Removal, Demo & Tiny Construction Chaos

A lot of this phase was honestly just figuring out what would come off easily… and what absolutely would not.

Some of the wallpaper peeled off in giant satisfying strips almost immediately.

Other sections came off in tiny little scraps and fought me the entire time.

I ended up spraying a lot of the walls down with Dawn Powerwash before scraping them because it actually loosened the old adhesive better than trying to heat everything up with a blow dryer or heat gun.

I think because the wallpaper and glue were so old, adding moisture worked way better than adding heat.

There was also a truly unnecessary amount of tiny renovation debris involved in this process.

Wallpaper scraps.
Tiny trim pieces.
Old glue.
Dust everywhere.

And somehow miniature demo still manages to create a very real renovation mess.

Rebuilding the Walls

Once most of the demo was done, I started rebuilding some of the downstairs walls.

The original surfaces underneath the wallpaper were pretty rough in a lot of places, so I cut thin wood panels to act as fresh “drywall” before moving on to flooring and interior finishes.

After painting the panels white with a foam roller, I glued and taped them directly onto the walls while everything dried.

The foam roller ended up giving the walls a really smooth finish that I liked way more than I expected to.

It also immediately made the rooms feel cleaner and brighter, even though everything was still very unfinished at that point.

Making the Floors

The original “wood floors” looked convincing from far away, but once I started pulling them up, they were basically laminated strips designed to imitate wood planks.

There really wasn’t anything underneath worth refinishing or saving.

So I decided to make completely new flooring instead.

I laser cut individual wood planks, then layered two different stain colors to create more variation and dimension in the wood tones.

And yes, laying individual miniature wood planks takes exactly as long as you would imagine.

Maybe longer.

I originally thought spreading glue across larger sections of the floor would make installation easier, but once I got going, I realized placing glue individually on the planks actually gave me way more control over spacing and alignment.

Especially around the front entry area where I had to start adjusting plank sizes to keep the flooring pattern lined up correctly.

It definitely took longer.

But it looked way better.

Tools + Materials Used

Full materials list and everything I use in my studio is linked in my Amazon Favorites — coming soon.

Watch the Full Build

The video above walks you through the entire process with voiceover. If you want to follow the full dollhouse kitchen renovation from the beginning, the complete series playlist is linked here.

What’s Next

There’s still so much to do inside this house (the exterior too!)

There’s still a long way to go, but I’m really excited to keep building this little world piece by piece.

Starting My Vintage Dollhouse Renovation

Starting My Vintage Dollhouse Renovation

I finally started renovating the vintage dollhouse I found on Facebook Marketplace last summer.

The house is from the 80s and already had a lot of charm, personality, and interesting details when I got it. But almost immediately, I started imagining what I wanted to change — different colors, updated exterior details, new windows, new rooms, new layouts, all of it.

So this video is basically the official beginning of the renovation.

I started with the exterior first: demo, scraping trim pieces off, repainting the roof and siding, and starting to figure out the overall direction I want the house to go stylistically.

THE ORIGINAL HOUSE

One of the reasons I loved this dollhouse so much immediately is because it already felt very lived-in and full of personality.

It’s not a perfect house. Parts of it are unfinished, some additions were clearly added later, and there are a lot of little details that need work.

Which honestly made it even more interesting to me.

I’ve always loved interiors, renovation projects, tiny details, and hands-on creative work, so this project immediately felt like the perfect combination of all of those things.

STARTING WITH THE EXTERIOR

Before I let myself get distracted decorating tiny rooms or buying miniature furniture, I wanted to start with the structure first.

So a lot of this phase was just demo.

Pulling trim pieces off. Scraping things down. Removing old details. Making a complete mess.

And honestly, the sped-up tapping and scraping sounds are weirdly satisfying.

This stage is still very rough and very unfinished, but it helped me start clearing things back so I could rebuild the exterior in a way that feels more aligned with the direction I have in mind for the house.

PAINTING THE ROOF & EXTERIOR

The black roof was one of the first design decisions I felt really sure about.

I wanted contrast, and I wanted the house to start feeling a little more updated while still keeping some of the original charm.

Once paint started going on, it became a lot easier to start visualizing where the renovation is headed overall.

Still definitely a work in progress though.

There are still windows to rebuild, exterior details to finish, rooms I haven’t touched yet, and about a hundred tiny decisions left to make.

THE WINDOWS

The little black windows are probably one of my favorite details so far.

They were also my first attempt at making miniature windows completely from scratch, which somehow felt both very fun and unnecessarily stressful at the same time.

The fact that they actually swing open still makes me ridiculously happy.

Tools + Materials Used

Full materials list and everything I use in my studio is linked in my Amazon Favorites — coming soon.

Watch the Full Build

The video above walks you through the entire process with voiceover. If you want to follow the full dollhouse kitchen renovation from the beginning, the complete series playlist is linked here.

What’s Next

This is really just the beginning of the renovation.

Every room is basically going to become its own tiny design project, which honestly feels very on-brand for me.

Next up will probably be more exterior work, windows, interior layout planning, and finally starting to work room by room through the house.

There’s still a long way to go, but I’m really excited to keep building this little world piece by piece.

Starting My Vintage Dollhouse Renovation

How I Built a Miniature Range Oven for My Dollhouse Kitchen (With a Laser)

In this dollhouse kitchen renovation build, I tackled my first DIY dollhouse range oven — and it might be my favorite make so far.

If you’ve been following along with my dollhouse kitchen renovation, you already know I’ve been building everything from scratch — custom flooring, a cased opening, and now the appliances.

This one might be my favorite build so far.

What I built

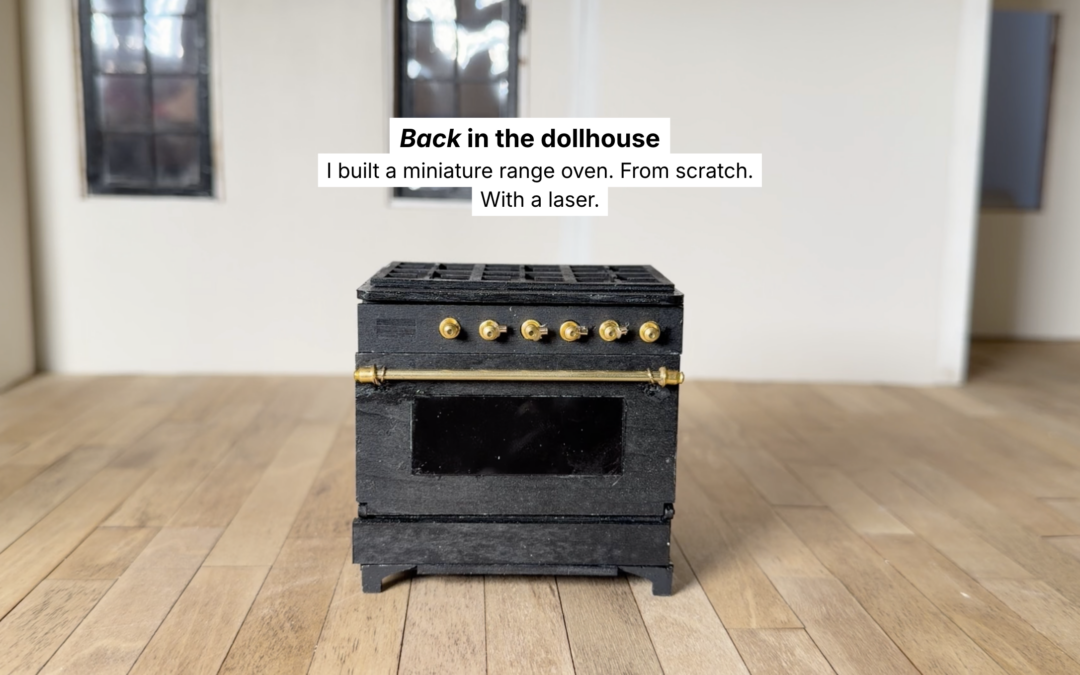
A DIY dollhouse range oven build — fully custom, black with bronze hardware, complete with a working door, a pull-out drawer, and a baker’s rack inside. Everything was built from a cut file I purchased on Etsy and cut on my xTool P2S laser.

The Build Process

It starts with a pile of tiny laser cut wood pieces that look like absolutely nothing. ( I cut them from a digital cut file I bought on Etsy). And then slowly, over a lot of gluing and painting and very small moments of panic, it becomes something.

A few highlights from this build:

The oven door glass is cut from acrylic — traced, scored with an exacto knife, and glued in with thin clear adhesive. It fits perfectly and I was unreasonably proud of that.

The door stays closed with tiny magnets — and I mean tiny. Like hold one up to your screen tiny. Getting those seated and glued without losing them was a whole thing.

The hardware — the knobs and handles — are made from laser cut wood circles painted with Rub ‘n Buff in a bronze finish, layered with jewelry findings to build up the detail. This part took patience I didn’t know I had. But the result looks completely custom and I love it.

The Finished Piece

This DIY dollhouse range oven build: Black matte finish. Bronze hardware. Working door with acrylic glass. Pull-out drawer. Baker’s rack. She’s not installed in the kitchen yet — we’re still working on cabinets and hardware — but she’s ready and she’s stunning if I do say so myself.

Tools + Materials Used

Full materials list and everything I use in my studio is linked in my Amazon Favorites — coming soon.

Watch the Full Build

The video above walks you through the entire process with voiceover. If you want to follow the full dollhouse kitchen renovation from the beginning, the complete series playlist is linked below.

https://www.youtube.com/playlist?list=PLRzHxY6RoI940EzTGAsgiFd56hdWXrkrb

What’s Next

The kitchen cabinets are done — you might have seen the sneak peek I posted — and next up is the hardware, the crown moulding, and finally getting everything installed. And yes, I’m planning some miniature food items for inside the cabinets. Cereal boxes. Maybe a tiny mug. We’ll see.

If you want to follow along, subscribe on YouTube or follow me on TikTok and Instagram @createwithlei for updates as the kitchen comes together.

Here’s the full dollhouse renovation series on the blog.