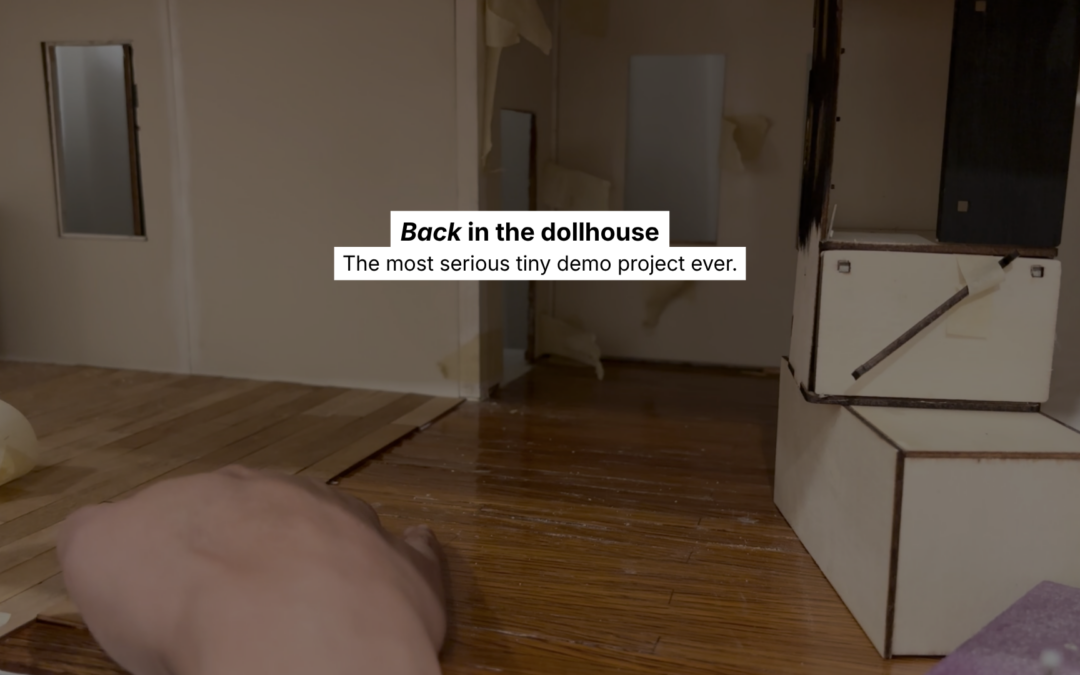
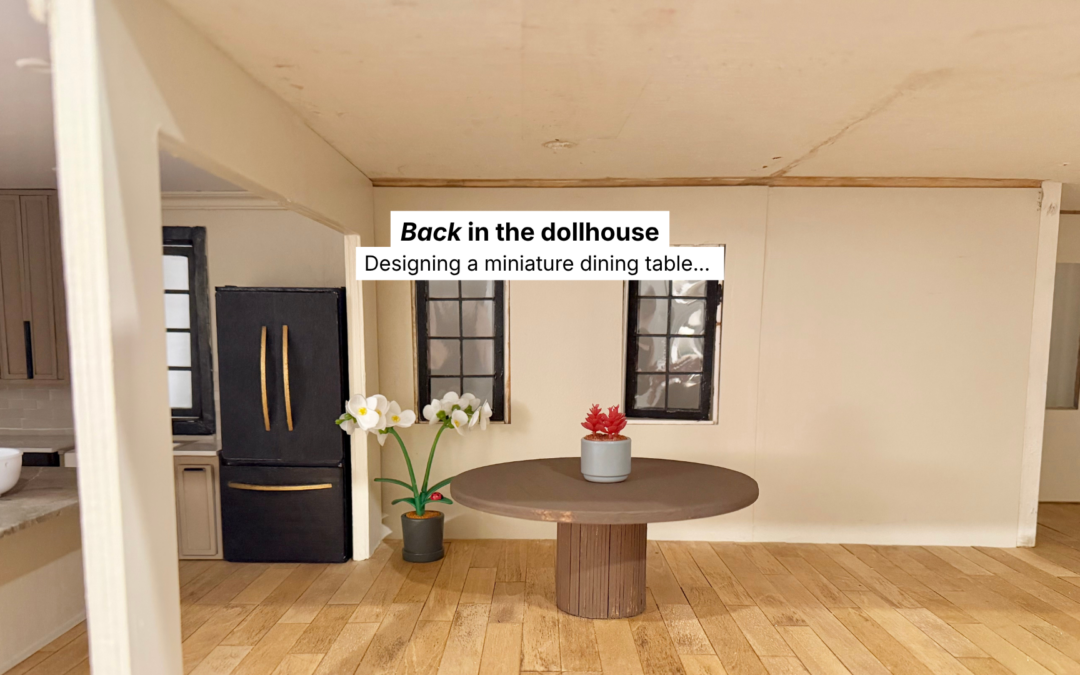
DIY Aged Vase Refresh

DIY Aged Vase Refresh

I found this beautiful aged vessel from TJ Maxx but the color was just too salmony and clashed with my whole house. I initially saw it at Home Goods for $19.99 or $24.99 and passed on it, even though I loved the shape.


Then when I saw it marked down to $7.99 on Clearance at TJ Maxx, the manager actually said it was a mistake but she honored the price, so I took it as a sign that it was meant for me. LOL

Aged vase
diy aged vessel

Anyway, so I loved the shape and the size of this vessel but the color was just not it. And if you know me, you know how much I love to paint so this was an easy fix!


I played around with a few different beige, taupe, and brown paint colors and mixed them together to create the perfect refreshed aged look I wanted. I used a paintbrush, foam brush, and paper towel to stipple and dab the paint colors in a very natural way.

vintage vase paints
how to age a vase
diy stipple paint on a vase

I essentially layered the paint colors, allowing the paint to dry in between coats. This vessel is very textured so it soaked up paint pretty quickly in some areas. Nonetheless, it only took a few rounds and coats of color mixes until I got the color blend that I was happy with and now i absolutely love it!

DIY aging vessel
How to age a vase
DIY Aged Vase Refresh
Moody Budget-Friendly Fireplace Refresh (Renter Friendly too!)

Moody Budget-Friendly Fireplace Refresh (Renter Friendly too!)

This fireplace has been a thorn in my side for quite some time and I’ve wanted to redo it for so long. But based on its location and how it was built, it meant it was going to be a larger and more costly project than I was prepared to take on so I let it sit and fester, ugly and glaring for a long time.


Until this Christmas season, I could not take it any longer and decided to myself in the middle and do a refresh, one that was more cost-effective and would at least make the space look much more visually appealing.

ugly old white fireplace

The big elephant in the room is the non-mantle mantle. There is a nonsensical black “board” that was placed there as a sort of a mantle that I detest and I have not yet removed it. The issue is the bump out that’s attached to the wall that is underneath the board, which prevents building out a real mantle. I will be removing them both but it is significantly more involved, it is coming but it will not be happening in this project **sobs**. Lol Moving on.


So what could I do as a quick weekend project to update my fireplace area so it’s not such an eyesore in the meantime? Let’s touch up the inside brick color, and change the old outdated white tiles and the icky tiling on the floor.

outdated 2000s fireplace

My fireplace has the gas option but we usually just burn wood in it. The only issue with that is that it gets gross on the inside so it was in desperate need of a touchup. So after cleaning it out, I repainted the inside brick walls with a black high-heat paint that’s made for high temperatures.

dirty fireplace insert
3d textured grey tiles

When it comes to the white tiles *barf* I really wanted to remove it all but this was supposed to be an affordable and quick weekend project. I still wanted tiles that had texture and dimension. I was able to find tiles that were made from a natural stone and had lots of texture, in a peel-and-stick option. I was so thrilled. 


These tiles are peel-and-stick but they are made from stone (though they are very thin pieces themselves and not thick stone) and they are safe to go on the outside of the fireplace. (These are not rated for direct heat inside of a fireplace and you should always do your own research before use in your specific environment).


textured peel and stick fireplace
dark grey fireplace tiles

I installed the tile and though it was a lovely dark grey with lots of variation it wasn’t quite as dark as I wanted.

So what I ended up doing was going over the tile, once I finished installing it, with a deep grey almost black paint wash.


fireplace brick repaint
DIY fireplace refresh
renter-friendly fireplace update
DIY Christmas Ornament Trees

DIY Christmas Ornament Trees

It’s no secret at all that I love Christmas decor, like “big-vinyl-sticker-I-heart-Christmas” love Christmas decor. Lol, I’ve made so many Christmas crafts, ornaments, and decor pieces over the years but honestly, I’m sorely lacking in photos and videos of so many of them! I also lost a lot of footage and image files. I’ve already sulked and cried about it … moving on.


I’m going to do my best to share pics of the older projects that I’ve worked on, but, like this project, I do not have any before or step-by-step photos. But I will share what I have for this one and any other of the older projects, and for the more current and future projects – because let’s be honest we all know there will be more to come – I am much better at documenting with photos and videos. What’s that saying about repetition?


Now that we’ve gotten that out of the way, let’s get to this blog post’s topic: Christmas ornament ball trees and wreaths!


Let’s start with the Christmas Ornament Trees, these were mini trees I had the best time making. I chose different color themes and sizes. These made excellent tabletop decorations, standing on the fireplace hearth, and great little gifts.


For the base, I tried out a few different materials: the cardboard spherical cones, and the styrofoam cones, and I even tried shaping leftover cardboard into a cone and stuffing the inside with craft paper (newspaper will do too) to keep the shape.


DIY Christmas Ornament Tree

For the balls, I gathered a variety of ornament ball sizes and glued them in a freestyle manner on the cone. I used hot glue and bravery because the fingertips did take an ‘L” or two, not going to lie. LOL.

For some of the trees, I added a little bit of tinsel or garland to sprinkle in and create a bit more fullness.

One note of caution, some of the ornament balls have glitter so be prepared for a glittery sparkly mess! 

Ornament Ball Tree
Red White Green Christmas Ornament Tree
soft white pink gold ornament christmas trees
diy christmas ornament tree
DIY Christmas Ornament Trees

DIY Christmas Pool Noodle Wreaths

DIY Christmas Pool Noodle Wreaths

Similar to the Christmas Ornament Trees post, I did not get step-by-step photos/videos for a tutorial of this one. But it’s a pretty simple project using basic materials so I still wanted to share what I worked on and maybe provide some ideas or inspiration. 


The wreath is made from pool noodles and tape. Yup, just regular old pool noodles! My crafty BFFs and I actually did this project as a volunteer giveback project at a local elementary school. 


So here’s what I did. I cut the pool noodle, curved it into a circle, and taped it there using heavy-duty Duck-brand tape. 

how to wreath foam noodle
Christmas ornament balls shopping

For the ornament ball wreath, I applied the ornaments with hot glue directly onto the foam pool noodles. There’s no exact science to how I placed the ornaments really lol. I just tried to make them as visually appealing as possible, separating colors, textures, and sizes. 

I also added a few decorative bows. 

How to make an ornament wreath
How to make a christmas wreath with ornaments

Once everything dried, I added ribbon with wire at the top so the wreath could be securely hung from a wall or a wreath hanger on a door! 


DIY Blue Christmas Wreath
DIY Christmas Ornament Wreath

One note of caution, some of the ornament balls have glitter so be prepared for a glittery sparkly mess! 

Snowman Wreath

The snowman wreath was my favorite and if I’m being honest, I really wanted to keep it. But alas, it was for a good cause and I did in fact donate it. 🙂  I may or may not be obsessed with snowman decor.


So for this guy, I took two pieces of pool noodles and folded them in two circles, one smaller and one larger. 

DIY snowman wreath
DIY Christmas Snowman Wreath
DIY snowman wreath pieces

Then I taped the two circles together. I added a piece of small firm cardboard between the middle of the two circles to help strengthen the tape joint that holds the two foam noodle circles together. 


From there, I wrapped the foam circles with soft white fabric and then strips of burgundy fabric.  I added a black piece of rectangular fabric for the scarf and made a hat out of cardboard and black felt. I added a spray of Christmas greenery to the hat, secured by hot glue, and voila! 

Christmas Snowman Wreath made of pool noodles

More Pool Noodle Wreaths

Here are a few more pictures of the pool noodle wreaths that my crafty BFFs and I made. These are all made with fabric, faux florals, ribbons, and little accessories:

DIY christmas wreath green and white
kitschy DIY christmas wreath
DIY christmas wreath white
DIY christmas wreath red white green
DIY christmas wreath colorful
moody color DIY christmas wreath
DIY christmas wreath red green colored