
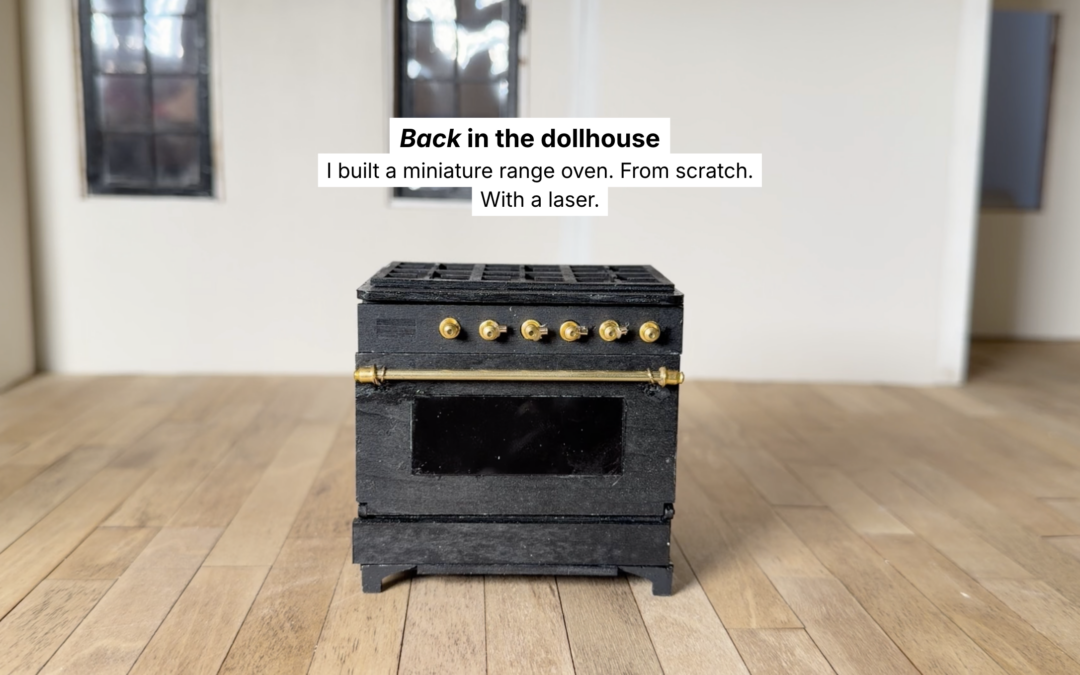
In this dollhouse kitchen renovation build, I tackled my first DIY dollhouse range oven...

How to Create a DIY Affordable (Budget-Friendly) Mantel for Under $50
Hey there, it’s Léi! Today, I’m diving into one of my favorite types of DIY projects—a budget-friendly fireplace mantel makeover.
If you’ve been staring at an outdated shelf or mantel in your living room and thinking, “I want to update this without spending a fortune,” then you’re in the right place.
For under $50, I’ll show you exactly how I turned my old Ikea Lack shelf into a sleek, stylish mantel that’s both affordable and doable for anyone.
Step-by-Step Guide: How to Transform Your Fireplace Mantel
Let me walk you through my process, so you can recreate this look in your own home! You can also watch the YouTube video below.

DIY Supplies You’ll Need
Here’s everything we used for this beginner-friendly DIY accent wall project:
2×6 pine boards – enough to cover the wall based on your desired design
cove moulding
ornamental moulding
unfinished wood corbel/bracket
Brad nail gun – for quick, secure attachment
Miter saw – to cut precise 45-degree angles
Painter’s tape – optional, to protect walls or ceilings
Construction adhesive – optional, for extra hold
wood filler – to fill in gaps and nail holes
Primer and paint, or wood stain
1. Removing the Old Mantel Shelf
My fireplace had been sporting an Ikea Lack shelf that’s seen better days.
The first step was taking it down—but of course, it wasn’t as easy as just sliding it off. With a little elbow grease and the right tools (hello, drywall anchors), I got that sucker off.
Pro tip: Always check for any construction adhesive or caulking that might be holding your old shelf in place!

2. Cutting and Measuring Affordable Wood Pieces
For this makeover, I wanted a mantel that spanned the full length of the fireplace, unlike the original Lack shelf that fell short.
So, I grabbed some budget-friendly pine boards and carefully measured them to fit the space. This step is all about precision—measure twice, cut once!
I also picked up some corbels and trim to give the mantel that extra pop of dimension and style.
For the DIYers out there: corbels are a fancy word for brackets, and they’re a great way to elevate the look without breaking the bank.

3. Assembling the Mantel
After cutting the wood to the perfect size, it was time to assemble everything. I stacked the boards, added trim for extra flair, and used simple wood glue and screws to secure it all together.
A few tricks I’ve picked up over the years: clamps are your best friend for keeping everything tight while the glue dries, and using a brad nailer can speed up the process of attaching trim.

4. Installing the New Mantel
Once the mantel was fully assembled, it was time to install it. Since my wall didn’t have studs in the right place (so annoying!), I used drywall anchors to ensure the mantel was properly secured.
For added support, I attached the corbels underneath the shelf—not only do they look cute, but they also help distribute the weight.

5. Adding the Perfect Stain for a Polished Look
The final touch was staining the wood. I went through a couple of color options before landing on a black satin finish that perfectly complements the rest of my living room decor.
If you’re unsure about which stain to use, don’t be afraid to try a few different samples until you find the one that speaks to your vision.
Bonus Tips for a Seamless DIY Mantel Makeover:
- Use What You Have: Before buying all-new materials, check if you can repurpose anything in your home. I reused some trim I already had on hand.
- Measure Accurately: This is key to making sure your pieces fit together properly and the final look is clean.
- Take Your Time: While I aimed for this project to be quick, DIY projects have a way of surprising us with small setbacks. Stay patient and enjoy the process!
Final Thoughts: Is a DIY Mantel Makeover Worth It?
Absolutely! This project only took a few days (and a few curse words), but now I have a mantel that’s both stylish and functional.
Plus, it didn’t break the bank. For under $50, I managed to give my living room a fresh new look that feels custom, without the cost of a full renovation.
If you’re looking to upgrade your space on a budget, give this DIY mantel makeover a try. It’s the perfect way to make a big impact without spending big money.
Like what you see? Don’t forget to like, comment, and subscribe to my channel for more budget-friendly DIY home projects. Let’s build this creative community together and keep creating beautiful, affordable spaces!


