


In this dollhouse kitchen renovation build, I tackled my first DIY dollhouse range oven...
How I Built a Miniature Range Oven for My Dollhouse Kitchen (With a Laser)
In this dollhouse kitchen renovation build, I tackled my first DIY dollhouse range oven — and it might be my favorite make so far.
If you’ve been following along with my dollhouse kitchen renovation, you already know I’ve been building everything from scratch — custom flooring, a cased opening, and now the appliances.
This one might be my favorite build so far.
What I built
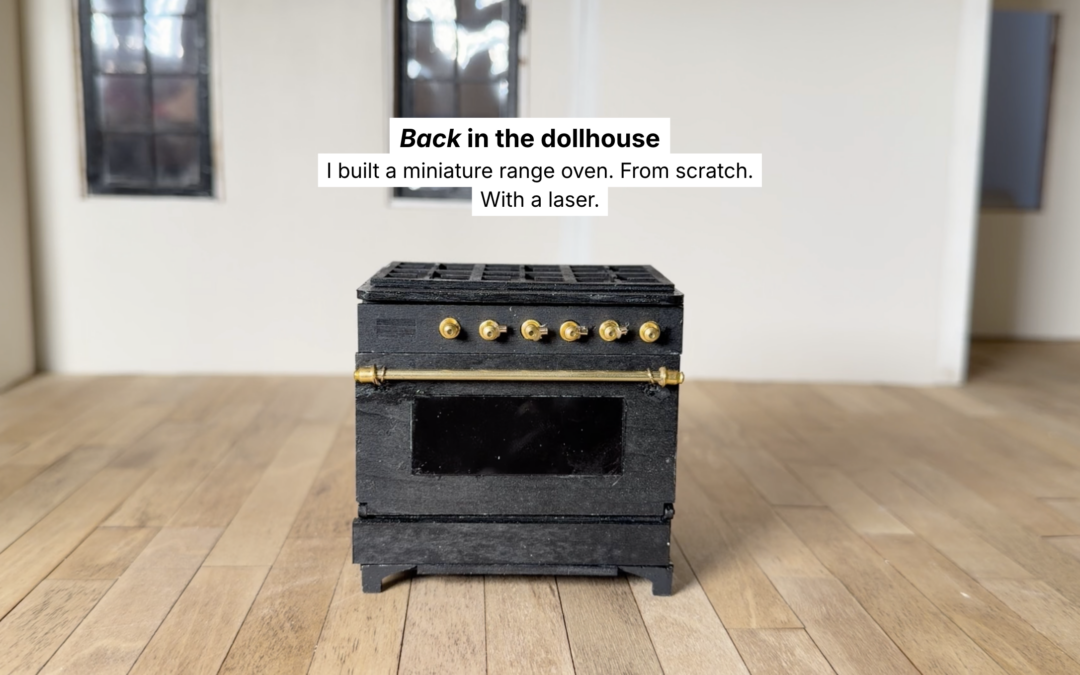
A DIY dollhouse range oven build — fully custom, black with bronze hardware, complete with a working door, a pull-out drawer, and a baker’s rack inside. Everything was built from a cut file I purchased on Etsy and cut on my xTool P2S laser.
The Build Process
It starts with a pile of tiny laser cut wood pieces that look like absolutely nothing. ( I cut them from a digital cut file I bought on Etsy). And then slowly, over a lot of gluing and painting and very small moments of panic, it becomes something.
A few highlights from this build:
The oven door glass is cut from acrylic — traced, scored with an exacto knife, and glued in with thin clear adhesive. It fits perfectly and I was unreasonably proud of that.
The door stays closed with tiny magnets — and I mean tiny. Like hold one up to your screen tiny. Getting those seated and glued without losing them was a whole thing.
The hardware — the knobs and handles — are made from laser cut wood circles painted with Rub ‘n Buff in a bronze finish, layered with jewelry findings to build up the detail. This part took patience I didn’t know I had. But the result looks completely custom and I love it.
The Finished Piece
This DIY dollhouse range oven build: Black matte finish. Bronze hardware. Working door with acrylic glass. Pull-out drawer. Baker’s rack. She’s not installed in the kitchen yet — we’re still working on cabinets and hardware — but she’s ready and she’s stunning if I do say so myself.
Tools + Materials Used
- xTool P2S Laser Cutter — https://amzn.to/4b8ufiU
- Airbrush booth — https://amzn.to/4kTueCJ
- Wood sheets – https://amzn.to/46qrRl1
- Airbrush – https://amzn.to/3ZV3YOP
- Gold/Bronze finish – https://amzn.to/4ccYSEZ
- Tiny magnets – https://amzn.to/4tUnB7r
Full materials list and everything I use in my studio is linked in my Amazon Favorites — coming soon.
Watch the Full Build
The video above walks you through the entire process with voiceover. If you want to follow the full dollhouse kitchen renovation from the beginning, the complete series playlist is linked below.
https://www.youtube.com/playlist?list=PLRzHxY6RoI940EzTGAsgiFd56hdWXrkrb
What’s Next
The kitchen cabinets are done — you might have seen the sneak peek I posted — and next up is the hardware, the crown moulding, and finally getting everything installed. And yes, I’m planning some miniature food items for inside the cabinets. Cereal boxes. Maybe a tiny mug. We’ll see.
If you want to follow along, subscribe on YouTube or follow me on TikTok and Instagram @createwithlei for updates as the kitchen comes together.
Here’s the full dollhouse renovation series on the blog.


